Facts About Dental Implant Recovery Process

Blog

Everything You Need to Know About Dental Implant Recovery


Introduction:

We have compiled this article on “Facts About Dental Implant Recovery Process”. The reference links are at the bottom of the article.


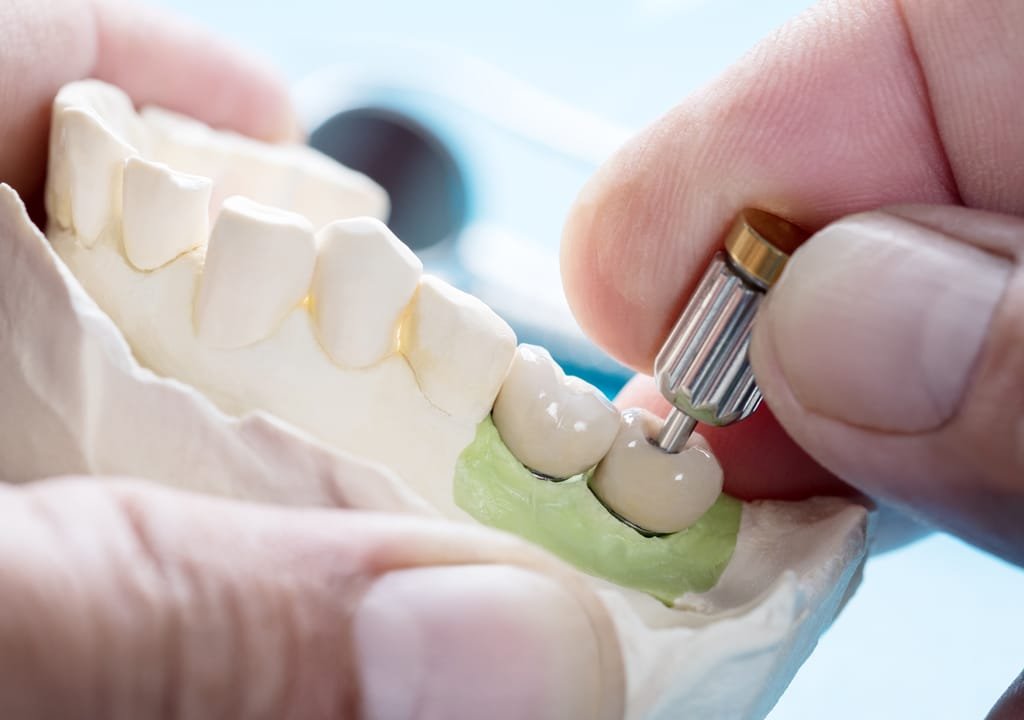
[1]While dental implant surgery may be intimidating to some, it is absolutely worthwhile; and the recovery time usually is not all that long either, making this a worthwhile investment. Recovery time can differ depending upon the individual and the particular surgery in terms of complications or amount of implants, but it generally takes a week to see a considerable amount of improvement in symptoms. Let’s go over what to expect once you arrive home from surgery and what you can do to ease any pain and inflammation.

Recovery Time

Recovery time is typically shorter than most people think. Usually most major symptoms of surgery clear up within the first week, but sometimes recovery can take longer, depending upon how many teeth you had implanted.

Generally, once you leave the dentist, you may experience mild bleeding from around the implant site; this is completely normal and should clear up within a few hours after surgery completion. You may also experience a pain associated with swelling and drainage, which should clear up after 2-3 days.

Once you have reached the third day, most of the bruising should have dissipated and the pain should subside substantially. You may also experience stiff jaw muscles, sore tongue and throat, and a dryness that will all largely subside within day 7.

Number Of Implants Received

Receiving one dental implant will have a much shorter recovery time than having a full implant surgery done, so this plays a big role in determining the time it takes for recovery. For example, an All-On-4 implant will take a longer amount of time than a single implant would, so this needs to be taken into consideration.

Bone Grafts

Bone grafts are needed if your jaw bone is not strong or thick enough to support the stress that an implant, especially the pressure an All-On-4 would put on the bone. If you lack proper bone thickness and/or strength, then you may need a bone graft. This will extend recovery by a minimum of a few weeks, with most discomfort subsiding within the next month or two. This also largely depends on how much bone grafting is needed, as a small amount bone grafting would not extend recovery time like a larger amount would.

[2]4 Facts About The Dental Implant Recovery Process

More than 8 million Americans have chosen dental implants for a more permanent solution for their smiles. The truth is dental implants are the next best solution after natural teeth. The process to receive dental implants happens over several months, but once you have them placed it will be well worth it!

In order to prepare for the this procedure, four facts to consider about the dental implant recovery process include the recovery time, bone grafting, changing your diet, and incorporating a good oral hygiene routine.

Here is what you need to know about each of these facts and how to best prepare yourself for a life-transformation smile.

Recovery Time Will Vary

The amount of time it will take for you to cover from receiving dental implants will depend on the amount of implants you received. However, the recovery time is actually much shorter than what most people realize.

You’ll experience most of the post-dental implant syndromes the first week, which could include some minor bleeding around the implant sites, swelling, bruising, sore tongue and throat, and stiffness in your jaw.

If you received just one dental implant, you’ll recovery time will be much shorter. If you had several or all teeth replaced with implants, then your recovery time will be much longer.

Bone Grafting

After factor to consider when thinking about dental implants is if there is a need for bone grafting.

The way that implants work is that the surgeon attaches them directly into your jawbone with something that resembles a screw. Think of this screw, also known as a post, as your new root. And once your gums are healed enough, the surgeon places the artificial tooth on the post.

Your surgeon will do 3D digital imaging beforehand to make sure your jaw can hold the post. If the surgeon determines that your jaw isn’t strong enough, you may need a bone graft. This is also another factor to consider when it comes to estimating your recovery time. If you do need a bone graft, your recovery time will be longer.

Changing Your Diet

After your dental implant surgery you will have to avoid certain food and drinks so your implant has time to heal. Some of the major food and drinks to avoid during your recovery include:

  • Acidic foods: lemons, tomatoes, grapes, apples, cheese, peanuts, pasta, rice, pizza
  • Acidic drinks: alcohol, pop, hot chocolate, sports drinks

Acidic food and drinks can irritate the tissue around your implant and cause you additional pain and inflammation.

It is also best to avoid eating anything hard to avoid the risk of causing any damage. Some recommended soft foods you can enjoy during the recovering process include:

  • Oatmeal
  • Fish
  • Eggs
  • Bananas
  • Baked beans
  • Avocadoes
  • Smoothies
  • Protein shakes
  • Ice cream
  • Mashed potatoes
  • Soup

You should eat soft foods at least one week after your procedure and perhaps even longer depending on the instructions from your surgeon.

Incorporating A Good Oral Hygiene Routine

If you brush twice a day and floss once a day already, then this will be no problem for you. You should continue your oral hygiene routine, but if you find it hard or painful to open your mouth right after your procedure, your surgeon will recommend rinsing your mouth with salt water or an antiseptic mouthwash to help prevent any infection.

When you are able to brush your teeth and floss, you should continue to do so, but make sure to be gentle during the recovery process.

  1. https://fountainhillsdentist.com/dental-implant-recovery-process-facts

  2. https://desai-dental.com/blog/4-facts-about-the-dental-implant-recovery-process

Conclusion:

Thank you for reading this article, and check back frequently for other dental health articles. Should you have any questions, please contact Apple Tree Dental today!

Article compiled by Apple Tree Dental

What Should I Do If I Knock My Tooth Out?

Blog

What Should I Do If I Knock My Tooth Out?

Introduction:

We have compiled this article on “What Should I Do If I Knock My Tooth Out?.” The reference links are at the bottom of the article.


[1]More than 5 million teeth are knocked out every year among children and adults. Dentists refer to a knocked-out tooth as an “avulsed” tooth. If you lose a tooth due to an accident or injury, it doesn’t necessarily mean it’s lost for good. Taking the right action and getting proper emergency care can save the tooth so that it can be replanted successfully and last for years to come. We take a look at what you should do if a tooth is knocked out and how it can be salvaged.

What Should I Do After My Tooth Is Knocked Out?

When a tooth has been knocked out, the nerves, blood vessels and supporting tissues are damaged, too. The nerves and blood vessels can’t be repaired, which is why all avulsed teeth will need a root canal. However, the bone can reattach to the root of the tooth once it’s put back into place. The odds of saving a tooth are highest in young children, but adult teeth can be saved as well. Only permanent teeth should be re-implanted. It is important to get to the dentist as quickly as possible after a tooth has been knocked out. It is also critical to avoid damaging the tooth even more. Follow these suggestions to improve the chances of saving your tooth:

  • Handle the tooth carefully. Try not to touch the root (the part of the tooth that was under the gum). It can be damaged easily.
  • If the tooth is dirty, hold it by the upper part (the crown) and rinse it with milk. If you don’t have any milk, rinse it with water. Don’t wipe it off with a washcloth, shirt or other fabric. This could damage the tooth.
  • Keep the tooth moist. Drop it into a glass of milk. If you can’t do this, place the tooth in your mouth, between the cheek and gum. A young child may not be able to safely “store” the tooth in his or her mouth without swallowing it. Instead, have the child spit into a cup. Place the tooth in the cup with the saliva. If nothing else is available, place the tooth in a cup of water. The most important thing is to keep the tooth moist.
  • Try slipping the tooth back into its socket. In many cases, it will slip right in. Make sure it’s facing the right way. Don’t try to force it into the socket. If it doesn’t go back into place easily and without pressure, then just keep it moist (in milk, saliva or water) and get to the dentist as soon as you can.

If the tooth is intact (not broken in pieces), it is always a good idea to try to save it.

[2]A Knocked-Out Tooth

If you knock out a tooth, you should:

  • find the tooth
  • hold it by the crown (the white bit that sticks out of the gum)
  • lick the tooth clean if it’s dirty, or rinse it in water
  • put it back into position (adult teeth only); never try to re-insert a baby tooth (see below)
  • bite on a handkerchief to hold the tooth in place
  • go to see a dentist as an emergency

If you can’t put the tooth back in position, put it in milk and see a dentist straight away.

The sooner a knocked-out tooth is re-implanted, the more likely it is to embed itself back into the gum.

If your child knocks out a baby tooth, you shouldn’t try to re-implant it because you may damage the adult tooth growing underneath. Take your child to see a dentist immediately.

[3]Act Quickly, Within 30 Minutes, And Visit The Nearest Dentist Or Endodontist.

Review and remember these tooth-saving steps that take you and your tooth from the time it falls out until you reach medical support:

Pick Up The Tooth By The Crown (The Chewing Surface), Not The Root.

Locate the tooth immediately; don’t leave it at the site of the accident. Handle the tooth carefully when you pick it up, and never touch the tooth’s root, only the crown (chewing surface).

If Dirty, Gently Rinse The Tooth With Water.

Use only water to gently rinse off any dirt. Do not use soap or chemicals. Don’t scrub or dry the tooth, and don’t wrap the tooth in a tissue or cloth.

Reposition The Tooth In The Socket Immediately, If Possible.

Try to put the tooth back into its socket right away. Gently push it in with your fingers by handling the crown, or position it above the socket and close your mouth slowly. Hold the tooth in place with your fingers or by gently biting down on it.

Keep The Tooth Moist At All Times.

The tooth must stay moist at all times, either in your mouth or, if it can’t be replaced in the socket, put it in milk, in your mouth next to your cheek, or in an emergency tooth preservation kit (such as Save-a-Tooth®). Don’t use regular tap water; root surface cells can’t tolerate that for extended periods.

See An Endodontist Or Dentist Within 30 Minutes Of The Injury.

Bring the tooth with you to your emergency appointment ideally. It’s best to see the doctor within 30 minutes; however, it is possible to save a tooth even if it has been outside the mouth for an hour or more.

Conclusion:

Thank you for reading this article, and check back frequently for other dental health articles. Should you have any questions, please contact Apple Tree Dental today!

Article Compiled by Apple Tree Dental.

Article Reference Links:

  1. https://wmsmile.com/what-do-i-do-if-my-tooth-is-knocked-out/
  2. https://www.nhsinform.scot/illnesses-and-conditions/injuries/dental-injuries/broken-or-knocked-out-tooth
  3. https://www.aae.org/patients/dental-symptoms/knocked-out-teeth/

Best Treatments For Teeth Sensitivity

Blog

Effective Treatments for Sensitive Teeth


Introduction:

We have compiled this article on “Best Treatments For Teeth Sensitivity.” The reference links are at the bottom of the article.


[1]When you have sensitive teeth, certain activities, such as brushing, eating and drinking, can cause sharp, temporary pain in your teeth. Sensitive teeth are typically the result of worn tooth enamel or exposed tooth roots. However, tooth discomfort is sometimes caused by other factors, such as a cavity, a cracked or chipped tooth, a worn filling, or gum disease.

If you’re bothered by sensitive teeth, visit your dentist. He or she can identify or rule out any underlying causes of your tooth pain. Depending on the circumstances, your dentist might recommend:

  • Desensitizing toothpaste. After several applications, desensitizing toothpaste can help block pain associated with sensitive teeth. There are a variety of products available over-the-counter. Ask your dentist which product might work best for you.
  • Fluoride. Your dentist might apply fluoride to the sensitive areas of your teeth to strengthen tooth enamel and reduce pain. He or she might also suggest the use of prescription fluoride at home, applied via a custom tray.
  • Desensitizing or bonding. Occasionally, exposed root surfaces can be treated by applying bonding resin to the sensitive root surfaces. A local anesthetic might be needed.
  • Surgical gum graft. If your tooth root has lost gum tissue, a small amount of gum tissue can be taken from elsewhere in your mouth and attached to the affected site. This can protect exposed roots and reduce sensitivity.
  • Root canal. If your sensitive teeth cause severe pain and other treatments aren’t effective, your dentist might recommend a root canal — a procedure used to treat problems in the tooth’s soft core (dental pulp). While this might seem a significant treatment, it’s considered the most successful technique for eliminating tooth sensitivity.

To prevent sensitive teeth from recurring, brush your teeth twice daily with a soft-bristled toothbrush and fluoride toothpaste and floss daily. Use gentle strokes rather than vigorous or harsh scrubbing, and avoid using abrasive toothpaste. If you grind your teeth, ask your dentist about a mouth guard. Tooth grinding can fracture teeth and cause sensitivity.

You might also consider taking care when eating or drinking acidic foods and drinks, such as carbonated drinks, citrus fruits and wine — all of which can remove small amounts of tooth enamel over time. When you drink acidic liquids, use a straw to limit contact with your teeth. After eating or drinking an acidic substance, drink water to balance the acid levels in your mouth.

[2]Home Remedies For Sensitive Teeth

Pain Relief For Sensitive Teeth

Regular dental appointments are just as important as doctor appointments, especially if you begin to experience consistent toothaches after eating cold foods or beverages. According to the Academy of General Dentistry, about 40 million people in the United States experience tooth sensitivity.

Finding the source of your sensitivity is important to recommending treatment. To ease the pain, there are some home remedies you can try until your next dental appointment.

8 Home Remedies For Pain Relief

Desensitizing Toothpaste

Desensitizing toothpaste contains compounds that help to shield nerve endings from irritants. The most active ingredient is potassium nitrate, a compound that blocks pain signals from your tooth’s nerve to your brain.

After a few uses, your sensitivity will reduce. Dentists also recommend using a soft-bristle toothbrush and low-acid or fluoride mouth rinses.

Salt Water Rinse

Salt is an effective antiseptic, and it can also help to reduce inflammation. To alleviate pain symptoms from sensitive teeth, gargle with a saltwater rinse twice daily. To use a salt water rinse:

  • Add ½ to ¾ tsp salt to a glass of lukewarm water and mix well.
  • Swish the solution in your mouth for up to 30 seconds.
  • Spit out the solution.

Hydrogen Peroxide

Hydrogen peroxide is a mild antiseptic and disinfectant. It is commonly used to help sterilize cuts, burns and other wounds to prevent infection. You can also use peroxide as a mouth rinse to heal gums and prevent inflammation. To use hydrogen peroxide as a mouth rinse:

  • Add two caps of 3 percent hydrogen peroxide to equal parts of warm water.
  • Swish the solution in your mouth for up to 30 seconds.
  • Spit out the solution.
  • Rinse your mouth with water afterwards to remove any remaining hydrogen peroxide.

Conclusion:

Thank you for reading this article, and check back frequently for other dental health articles. Should you have any questions, please contact Apple Tree Dental today!

Article compiled by Apple Tree Dental
Article reference links

  1. https://www.mayoclinic.org/healthy-lifestyle/adult-health/expert-answers/sensitive-teeth/faq-20057854
  2. https://www.healthline.com/health/sensitive-teeth-home-remedy#prevention